


The Basics of Powerlifting Episode 1: The required equipment.
- Craig Cassie

- Oct 21, 2025
- 8 min read
Updated: Mar 2
The Basics of Powerlifting: A Comprehensive Guide by Craig Cassie

Introduction
Hello everyone!
In this series, I will cover the basics of powerlifting. We will discuss the required equipment, minimum standards, specialty barbells, and provide information on the top three federations in the UK.
If you’re unsure whether powerlifting is for you, or if you simply want to learn more about the sport, this article series is for you. I hope it guides you toward a path that suits you. Or, you might decide to run away, and that’s understandable too!

The Required Powerlifting Equipment
In this initial episode, we will cover the equipment needed to compete and train in powerlifting. We will also touch on optional pieces of equipment you may wish to gather along the way.
Contrary to what you see on social media, where everyone flaunts the latest gear, the equipment needed for powerlifting is minimal. You might be surprised at how little you actually need.

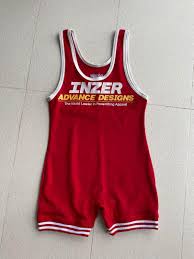
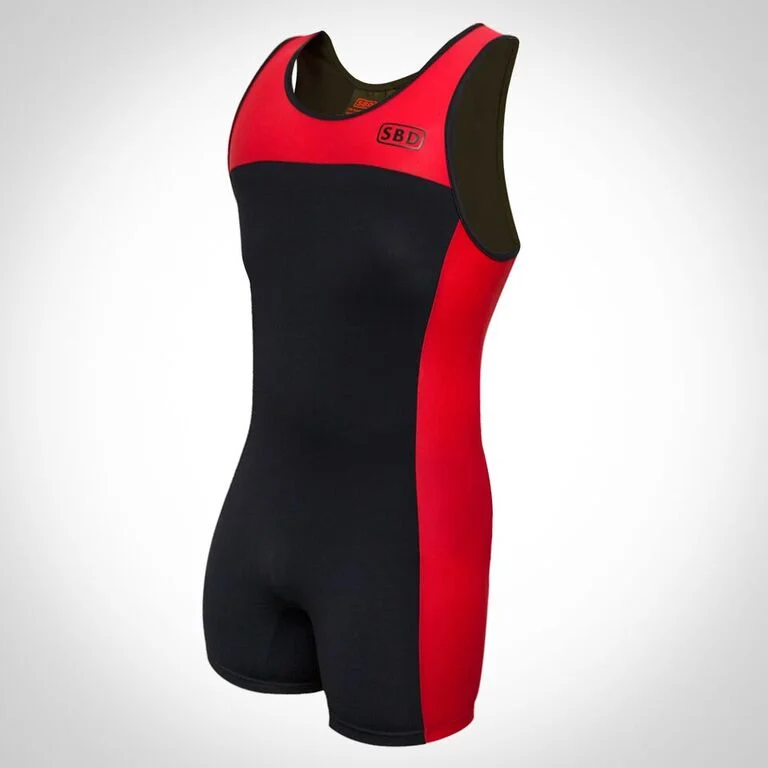


The Singlet
The basic requirement to compete is a singlet. In some novice platforms or gym-run competitions, you might not even need one. However, if you wish to compete within a federation and get a total on the ultimate ego checker that is open powerlifting, a singlet is all you need.
The main purpose of a singlet is to ensure consistent judging. It prevents competitors from hiding poor depth and lockouts. It’s not about looking good under the lights!
And who doesn’t want to wear a super thin baby grow while straining under bright lights?
Deadlift socks are also essential for the deadlift in competition. They prevent competitors from leaving skin or blood on the bar. You can grab a £3 pair of Sondico football socks from Sports Direct.


Gym Requirements
Another misconception about powerlifting is which gyms are suitable for training. The truth is, all gyms can be suitable in some capacity.
Some gyms may ban chalk and deadlifts, but they can still serve a purpose. Due to work constraints, I spent about eight months doing speed bench at my local leisure centre. In a pinch, or to save commuting time to a ‘powerlifting gym’, these facilities can be more than adequate. Even the most remote leisure centres usually have racks or cages for squats or bench presses.
Now that I’ve finished wittering about leisure centres, let’s look at what your average traditional ‘powerlifting gym’ contains. Aside from specialty bars, they typically have cages or combo racks for squatting, possibly a Monolift if you’re lucky, minimal machines, a full dumbbell selection, and a set of cables.
These basics have been helping people get big and strong for many years—longer than most readers have been alive. You won’t find any fancy machines here; just shifting some weights on a chalk and talc-covered floor, with the occasional spot of blood on the knurling of the bars.
Interestingly, this is what you find in almost every gym today. The fitness industry has boomed, and powerlifting has gained popularity, especially with the rise of social media. Even your local council-run leisure centre will have enough equipment for squat and bench sessions. Deadlifting can be a bit sketchy, but your local 24-hour gym will likely have at least one platform now.
The training requirements for powerlifting can be as low as you want. If you have a barbell and plates in your garage, that’s fantastic! If you’re at a 24-hour fitness centre, you can access barbells, plates, dumbbells, and racks. Even high-tech bodybuilding gyms have the basics listed above.
It’s crucial to find the right gym for you. This may sound cliché, but it’s true. Not everyone enjoys the atmosphere of a powerlifting gym with ACDC blasting, dirty floors, and people grunting. You might prefer a bodybuilding gym, where most people work quietly and cleanly, making it easier to isolate yourself during peak times.
If you have a busy schedule, a 24-hour fitness centre may be ideal. Remember, powerlifting isn’t the be-all and end-all of life, despite what you see on social media. Having a gym you can easily access during your commute or family downtime is perfect.
If you work in the NHS, local council, or emergency services, you might get reduced rates at your local leisure centre, which can provide great options for something different for general physical preparedness (GPP).
Too long; didn’t read: Find a gym where you feel comfortable. All equipment can be workable if you have access to the basics. The goal is to train somewhere consistently, not to chase the perfect setup, as it might not be perfect on competition day.
Optional Equipment
The Belt
While a belt is optional, it’s one of the most recommended pieces of equipment for support. An upcoming article will cover how to brace correctly, not just flex your abs. There are several types of belts available, each with different clasps. It’s worth weighing your options before spending money, as they can be pricey.
Most belts come in 10mm or 13mm thickness. This difference may seem minimal, but personal preferences vary. If you’re at a gym with others, try both thicknesses. Some people find the 13mm more restrictive during deadlifts and squats than the 10mm.

The Prong Belt
The prong belt is a traditional option, similar in design to a regular belt. It often features two prongs instead of one. These belts are generally more affordable and versatile than other options, such as the lever belt. You can quickly adjust the tightness by tightening or loosening it like a dress belt.
However, if you have pressure issues, the prong belt lacks a quick-release function. Models claiming to be quick-release fall short compared to other options. Most brands offer only one-inch adjustability between holes, while Pioneer offers half-inch adjustability, avoiding awkward in-between holes.

The Classic Lever Belt
If you want to remove your belt quickly and don’t need quick adjustability, the lever belt is a good choice. While it requires a screwdriver and patience to adjust, it allows for rapid pressure release after a lift. These belts are widely available but tend to be pricier than prong belts.
For those who don’t frequently manipulate weight, they are a great option. However, adjustments can wear out the screw holes, so keeping them to a minimum is ideal. Some buckles have been known to blow off, but most major brands now offer guarantees. Pioneer offers a lever belt with a small level of adjustability, making it a viable option.

The SBD Belt
No matter how many brands try to copy it, the SBD belt remains the standard. It offers all the adjustability of a prong belt with the practicality of a lever. Over the years, the quality of the lever has noticeably changed, but it still stands alone at the top. If you can find an older model in good condition at a reasonable price, it’s worth snapping up.
If you must buy new, try to compare it with other styles to make an informed decision. These belts are adjustable in one-inch increments, similar to other belts, except for Pioneer.
At the end of the day, your belt is largely a showpiece if you don’t learn to brace properly. Proper bracing helps you transfer force efficiently, not just feel tighter.

Knee Wraps
Depending on your competition class, you may have the option to use knee wraps. They come in lengths of 2m, 2.5m, and 3m, with various designs and fabrics. The choice can feel overwhelming, and more isn’t always better.
Some lifters struggle to hit depth consistently when using wraps, as they are meant to be an aid, not a crutch. Consult your federation’s rulebook for permitted lengths and any restrictions on extra material, such as Velcro.
General advice is to start with a softer pair, perhaps 2m or 2.5m. When wrapped properly, they may feel uncomfortable, but they go on quicker than stiff sleeves and come off faster too.
The materials vary from soft, springy wraps that don’t overly restrict the joint to stiff wraps that limit forward knee travel.
More isn’t always better. Sometimes, a shorter, tighter wrap that offers less joint restriction could be all you need.

Knee Sleeves
Knee sleeves have become quite popular. If you want competition-legal sleeves, refer to your federation’s rulebook, as some only allow certain brands or thicknesses.
The advent of super stiff knee sleeves is likely to push raw numbers higher. They often feel comparable to loose wraps if you size down. However, they take time to put on and may require assistance to remove.
A common choice is 7/9mm neoprene, with tightness dictated by your size. Some lifters even buy two sizes—one for training and one for competition.
You might see lifters wearing sleeves during lifts that make you wonder why they need them. However, they can provide joint warmth and support, serving as a mental aid.
Equipped lifters can explore two- and three-ply offerings, which are great for additional support outside of wraps. However, they shouldn’t be relied upon.
Do everyone around you a favour and wash your sleeves regularly. This helps them tighten back up after use and prevents unpleasant odours.
Seriously, knee sleeves can be fantastic training tools, not just for those in wraps or equipment. If you train in a cold gym, finding the right pair can be invaluable.
Elbow Sleeves
The devil, I’m being dramatic, of course.
Too often, lifters complete all their bench sessions in elbow sleeves, only to wonder why their competition bench is lower than their training numbers.
Like knee sleeves, elbow sleeves come in various thicknesses and multiple plies. However, they aren’t usable on competition day.
When used correctly, elbow sleeves can be extremely helpful. They keep joints warm in cold gyms or help manage injuries or tendonitis.
For equipped lifters, they can be beneficial for raw maximal effort work.
You’d be hard-pressed to find a federation that allows elbow sleeves, so work with your coach to use them wisely. Don’t rely on them, as it will only lead to disappointment on the platform.

Wrist Wraps
Wrist wraps are the second most common item you’ll see in the gym.
They are not just for sitting around your wrist; they are designed to be tightened around your wrist for support. Different rulebooks have varying standards, so always check.
Wrist wraps come in multiple lengths, allowing for extra revolutions and varying stiffness. If you’re a thumbless bencher, super stiff wraps can force your hand into an upright position, which may cause you to lose the bar.
It’s essential to try out different equipment. If you watch your hand position on bench videos, it may give you clues about which wrap suits you best.
I have a soft short pair for heavier raw work and a long stiff pair for when I’m in the shirt and lifting over 250kg.
Not one size fits all. Examine your joints when you bench and make a decision accordingly if you can’t try a pair.
Postscript
I understand that all of this may feel overwhelming to newcomers. Powerlifting can seem complicated, filled with details that need studying.
The beauty of powerlifting is that it’s as complicated as you want it to be. If you want to lift in just a singlet and belt, you can. If you want to try all the equipment and compete like a budget inspector gadget, that’s possible too.
Powerlifting is a sport of whatever you allow it to be for YOU. Whether you prefer minimal equipment or full-blown multiply, it all has a place and its own community.

Craig Cassie is a strength coach with over 17 years of coaching experience across rugby, strongman, and powerlifting. A former Team Josh Hezza athlete turned JHEPC coach, he’s known for his sharp technical eye, fast communication, and terrible sense of humour. Craig specialises in building strength, fitness, and resilience through a Conjugate-inspired approach that prioritises both performance and long-term health.

$50
Product Title
Product Details goes here with the simple product description and more information can be seen by clicking the see more button. Product Details goes here with the simple product description and more information can be seen by clicking the see more button

$50
Product Title
Product Details goes here with the simple product description and more information can be seen by clicking the see more button. Product Details goes here with the simple product description and more information can be seen by clicking the see more button.
$50
Product Title
Product Details goes here with the simple product description and more information can be seen by clicking the see more button. Product Details goes here with the simple product description and more information can be seen by clicking the see more button.


Comments